Support: Colossus
Colossus Windows Treiber und Anwendung
 colossus_1_8_31093.zip
Zur Installation des Windows Treibers:
Führen Sie bitte folgende Schritte aus, wenn die Colossus eingesteckt ist:
- Laden Sie die Treiberdatei, in dem Sie auf den obigen Download Button klicken.
- Entpacken Sie diese Datei in ein Verzeichnis wie z.B. c:\temp.
- Um den Windows Treiber zu installieren, öffnen Sie diesen Ordner und starten HCWDRIVERINSTALL.EXE.
- Nach dem Ende der Installation sollten Sie eine Nachricht Drivers have been updated successfully erhalten.
- Starten Sie den PC einmal neu, damit der Treiber aktiv wird.
Name: colossus_1_8_31093.zip
Größe: 7.6 MB
Datum: 9.04.2013
ArcSoft ShowBiz Anwendung:
Falls Sie eine ältere Version von ArcSoft ShowBiz bekommen haben, gehen Sie auf Start/Alle Programme/ArcSoft ShowBiz/ProduktUpdates, und schauen, ob hier eine neuere Version angeboten wird.
WinTV v8 Anwendung
Zusätzliche Software für Colossus
Blaster Configuration: Das IR Blaster Konfigurationsprogramm
Dieses Programm konfiguriert den IR Blaster für die Nutzung mit der WinTV Anwendung. Enthalten ist eine Auswahl von Set-Top-Boxen und ein Lernmodus.
Hier ist die Installationanleitung für den IR Remote Blaster
Anwendungen von Drittanbietern
MediaPortal Version 1.2
MediaPortal Version 1.2 unterstützt nun Colossus.
HD Aufnahme von einer Xbox 360
Hinweis: Vor dem Anschluss einer Xbox 360 an HD PVR oder Colossus, verbinden Sie diese mit Ihrem HD Fernseher oder Monitor um die erforderlichen Einstellungen vorzunehmen. Als Standard gibt Xbox 360 im 1080p Format aus, welches HD PVR oder Colossus nicht unterstützen. Ändern Sie das Format der Xbox 360 auf 480p, 720p, oder 1080i.
Anschlussdiagramm
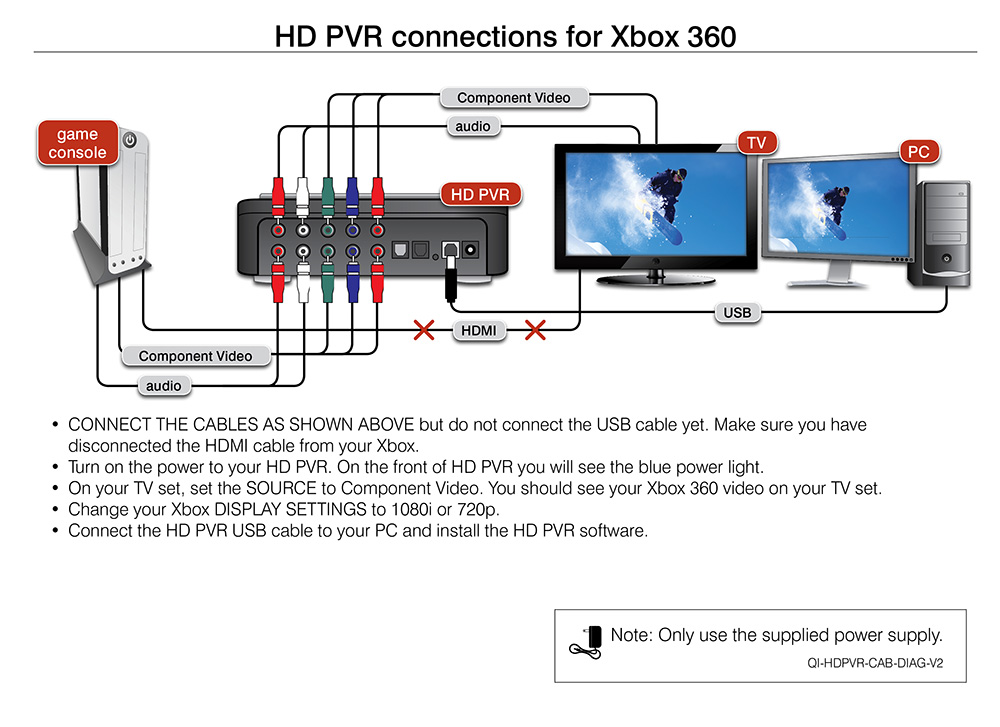
Hier klicken für ein größeres Bild
Schauen Sie dieses YouTube Video zur Xbox Einstellung oder schauen auf die Abbildungen weiter unten
Schrittweise Anleitung für Xbox 360
Schalten Sie Xbox 360 ein und gehen zum Haupmenü.
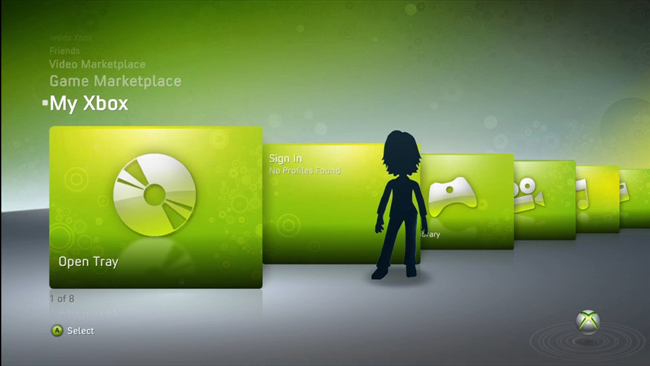
Gehen Sie zum letzen Menü nach rechts und dort zu Systemeinstellungen.
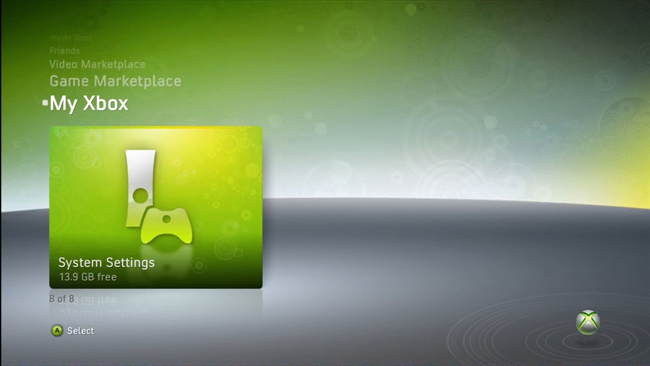
Gehen Sie zu Konsole Einstellungen

Gehen Sie zu Anzeige.
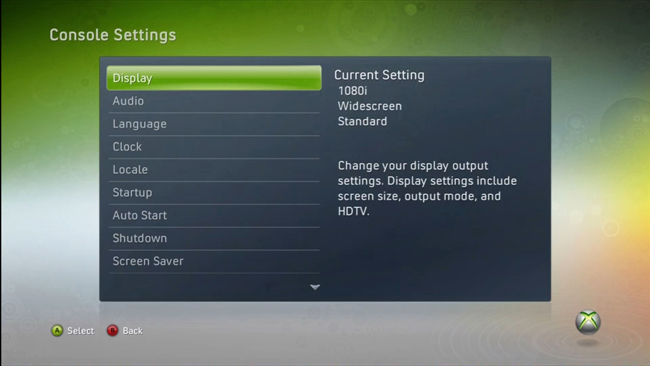
Gehen Sie zu HDTV Einstellungen.

Nun wählen Sie die Auflösung.
Die HD PVR oder Colossuns geht nur bei 480p, 720p oder 1080i. Falls 1080p eingestellt ist, wechseln Sie bitte auf 720p.
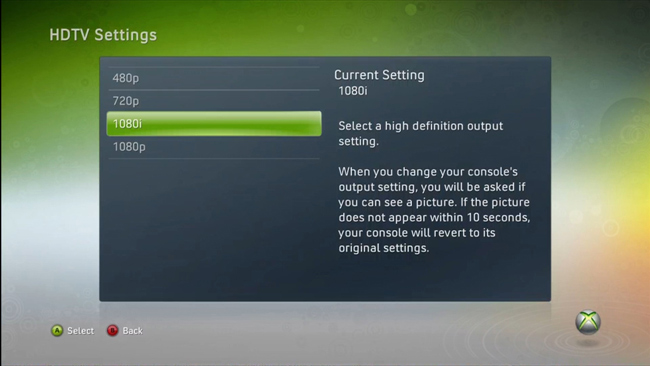
Falls Sie die Auflösung geändert haben, werden Sie gefragt, ob Sie diese beibehalten wollen. Bitte Wählen Sie Ja, diese Einstellungen beibehalten.
Sie sind jetzt fertig.
Schalten Sie Xbox 360 aus ind schließen die HD PVR oder Colossus mit Component Video Kabeln an.
Recording high definition video from a Playstation3
Note: Before connecting your PS3 to the HD PVR or Colossus, connect it to your HD TV set to make the changes to the PS3 video modes settings. By default, the PS3 will be set to 1080p and HD PVR and Colossus will not work with this resolution. You will need to change your PS3 360 to 480p, 720p, or 1080i.
Connection diagram

Click for larger image
Watch this YouTube video for setup instructions, or look below for screen shots
Step by step instructions
Before connecting your PS3 to the HD-PV or Colossus R, you must set the proper PS3 video output. These are instructions on how to do this.
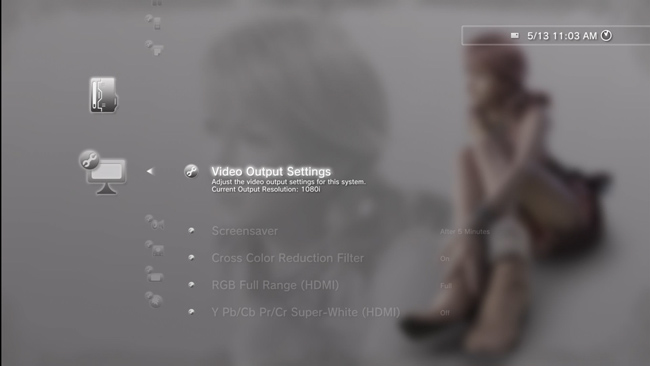
First, navigate to the Settings column on the PS3 main screen.
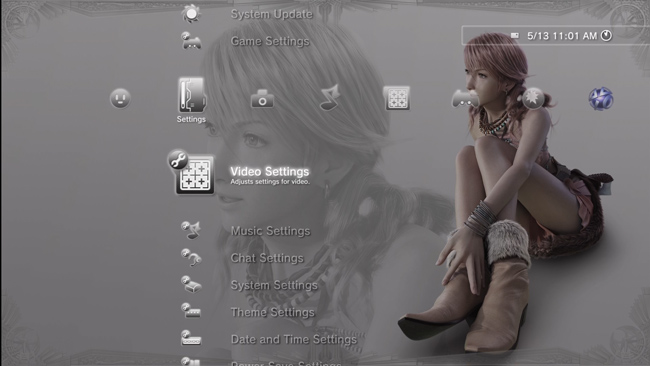
Scroll down to Display Settings
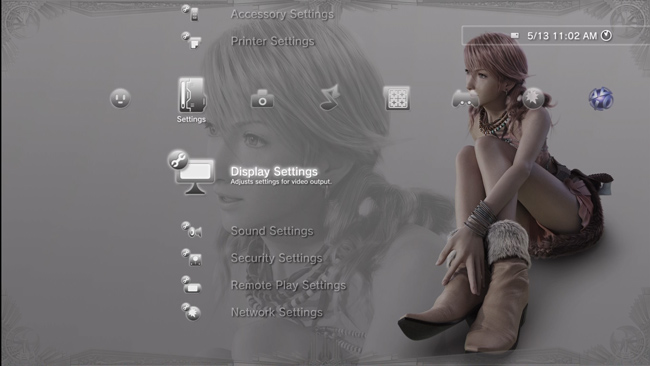
Select Video Output Settings.
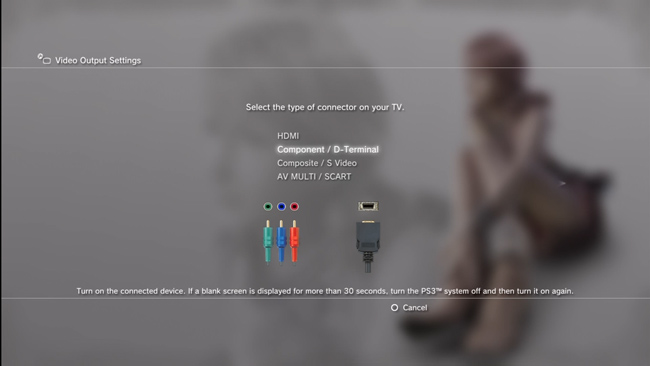
Note: You should have your component cables attached to your TV. If not, please take a moment to attach the component cables to the TV.
Select Component/D-terminal. You will then be given a confirmation and after proceeding, you need to change your TV to the component video.
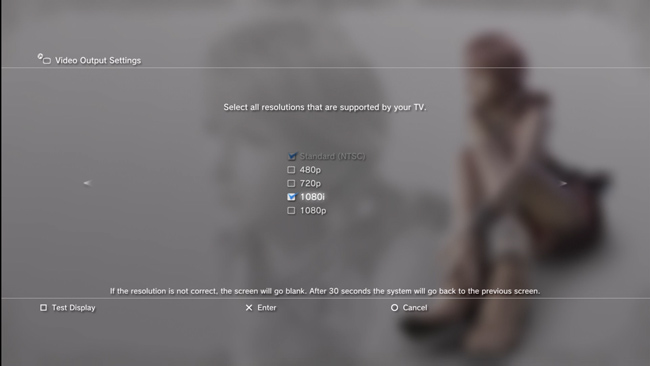
Next you will receive a screen were you will select the desired input resolution.
HDPVR and Colossus can accept up to 1080i so select 1080i. You can also select 480p and 720p.
After selecting 1080i, hit X Enter to go to the next step.
Confirm that you have selected 1080i by clicking X Enter.
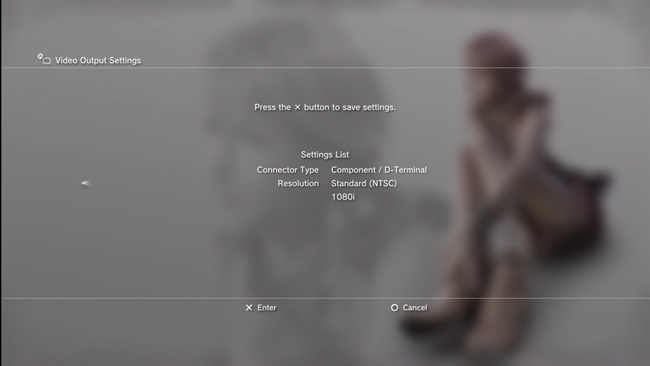
Next you will be prompted to set up the Audio Output Settings and then click X Enter.
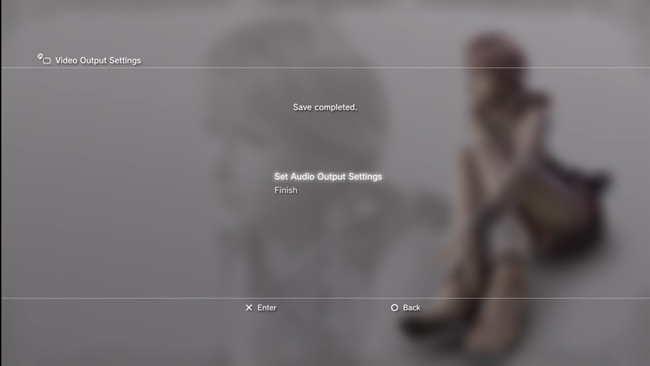
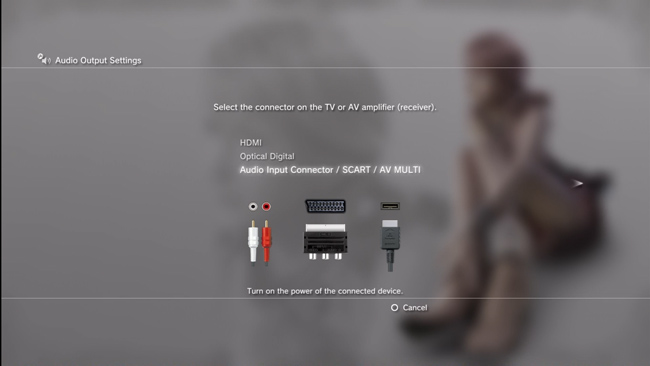
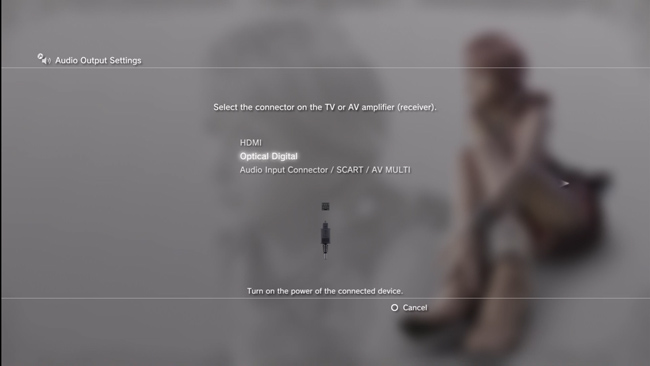
Here you will select either audio input connector or optical digital (cable sold separately). Chose the way audio will be connected to the HD PVR/Colossus.
You will be shown the audio settings. Click X Enter to continue.
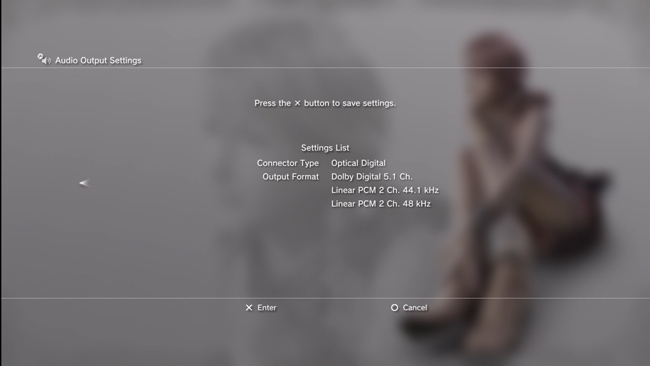
If you select Audio input connector you will be prompted to finalize the setup.
If you have selected optical you must select the compatible formats either PCM 2ch or Dolby 5.1.
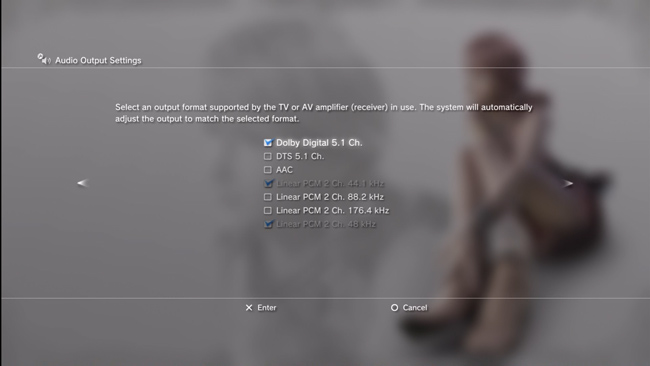
After you confirm your audio settings, you may now power down the PS3 and connect it to your HD PVR / Colossus.
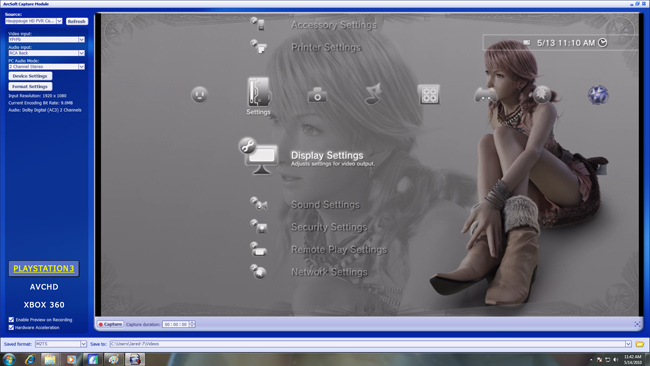
When you open the Arcsoft capture module, select YPrPb for you video input and either RCA back (if you selected audio input connector) or S/PDIF (if you chose digital optical) for your input audio.
Then capture some high definition video!
Colossus Videos zu YouTube hochladen
Die Schnittstelle zum Upload nach Youtube in ArcSoft Showbiz funktioniert nicht mehr. Verwenden Sie bitte statt dessen die Hauppauge Capture Anwendung zum Upload zu Youtube.
Prodinfo.exe ist eine Anwendung die ein Hauppauge Produkt auslesen kann und so Informationen für den Support (wie Seriennummer, Hardwarerevison, Features) zusammen stellt. Vor dem Start dieses Tools muss der Treiber für das jeweilige Hauppauge Gerät installiert sein.
HCWCLEAR.exe ist ein Tool, um alle WinTV-Treiber und -Anwendungen zu deinstallieren.